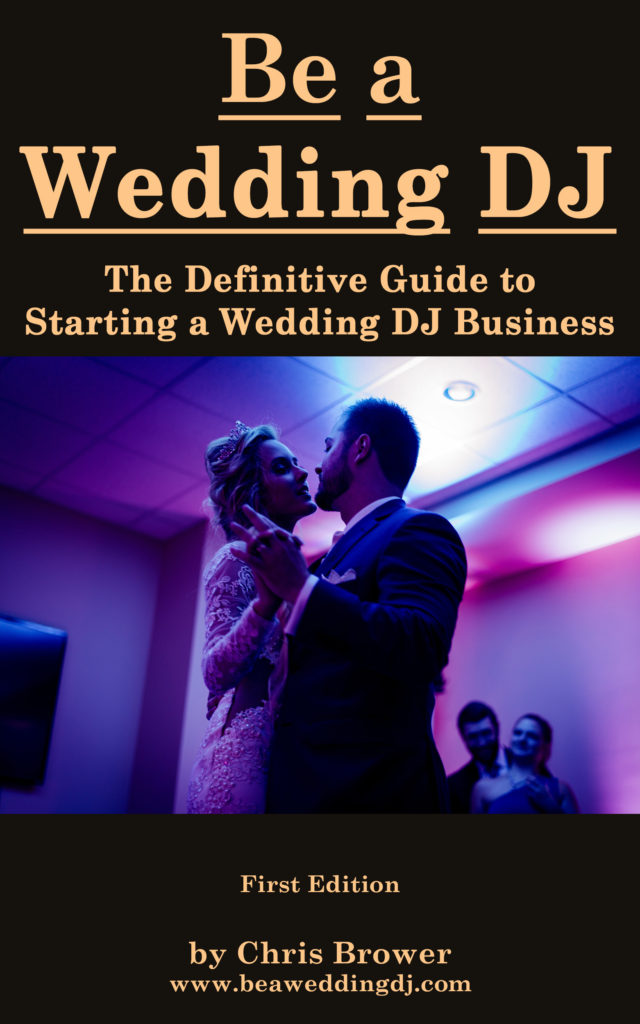
How to Use a Sound Mixer for Wedding DJs
by Chris Brower
Last Updated: January 12, 2024
The mixer is one of the essential pieces of wedding DJ equipment.
It’s the hub where you’ll plug in many of your audio components and control the volume and EQ of the music and microphones.
Let’s dig into all you need to know so you can operate a sound mixer like a pro.
How Many Channels Do You Need for Your Sound Mixer?
You potentially need a channel for each audio source you plug into your mixer. For me that includes:
- The music coming from my laptop.
- A wired microphone.
- A wireless microphone.
- A lavalier/lapel microphone.
And that’s it. Thus, by that math I need at least four channels.
Occasionally, you may have additional audio sources you need to plug in, such as a cell phone to play music from or an additional laptop that’s playing a video slideshow and you need to project the audio through your sound system. And certainly if you also provide live music, such as an acoustic guitar (that can be amplified), then you’ll need a channel for that.
So you probably need 4 to 8 channels.
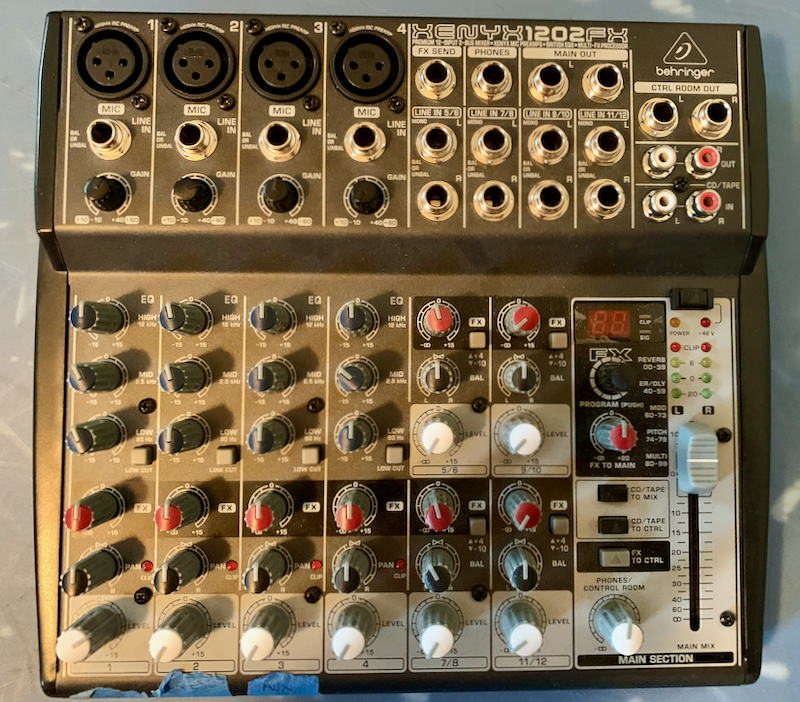
I use the Behringer Xenyx 1202FX* (pictured above).
It’s by no means the fanciest mixer out there, but it’s worked great for me and is pretty affordable. It has four channels with microphone-connection capabilities (where an XLR cord can plug into it), plus additional inputs for 1/4″ cords and things like that.
So get yourself a mixer with enough inputs, but by no means do you need those huge mixers you see in fancy recording studios or for bands that play at arenas.
Mixer Basics
- Don’t plug in or unplug things to the mixer while the mixer is on. You’ll hear loud popping sounds. Ouch! Keep the mixer off while you connect or disconnect things.
- Turn on your mixer before turning on your speakers. If you don’t, you might similarly hear a loud popping sound come out of speakers when you turn on the mixer.
- Before turning on the mixer, make sure you don’t have knobs turned very high or all the way up. You could even turn everything all the way down. That way you reduce the likelihood of turning on your mixer and speakers and hearing loud feedback. It’s better to start with things being too quiet than way too loud.
- Generally, only plug in one thing to each channel. Though you may have an input for a microphone AND an instrument/other audio source on the same channel, it’s best to just plug in one item to a channel. After all, all things plugged into that channel will be affected by volume and EQ adjustments you make to that channel. What may be the perfect settings for a microphone may not work well for another audio source plugged into that channel.
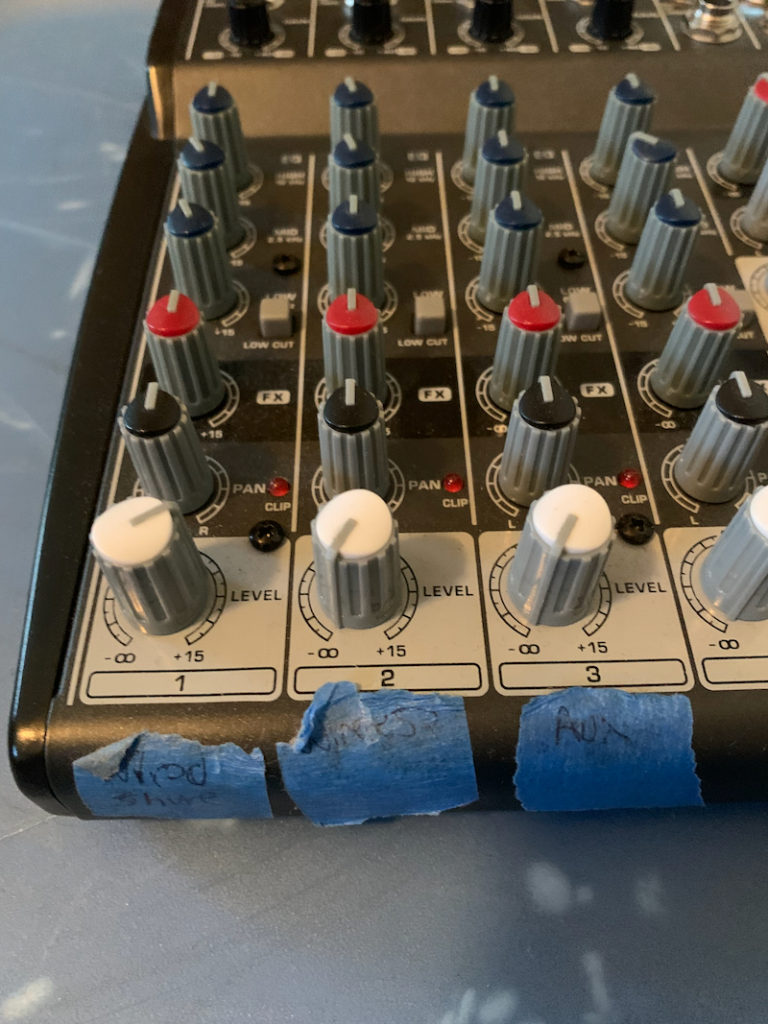
- If you want to label what each channel is (wireless microphone, wired microphone, etc.), you could put a piece of painter’s tape below each channel and write on it what audio source is connected to that channel. Why painter’s tape? It won’t leave a sticky residue on your mixer. I use ProTapes blue painter’s tape.
How to Connect a Laptop to a Mixer
Let’s assume you’re using a laptop or similar device to play music. You’ll need to connect that to your mixer.
There are a few good ways to connect a laptop to your mixer. When I wrote this article, I asked several other DJs how they did it, and I got a bunch of answers! So there’s not just one way.
First of all, you want to connect it to a stereo channel, as the audio coming from your laptop will be a stereo signal (a left and right channel). There are a few spots for this on your mixer:
1) A set of two 1/4″ inputs, with an “L” by one and an “R” by the other, with the L input directly above the R input. On the mixer, you may see something like 7/8, 9/10, etc. by those channels. This is shown in the photo below (in the blue box).
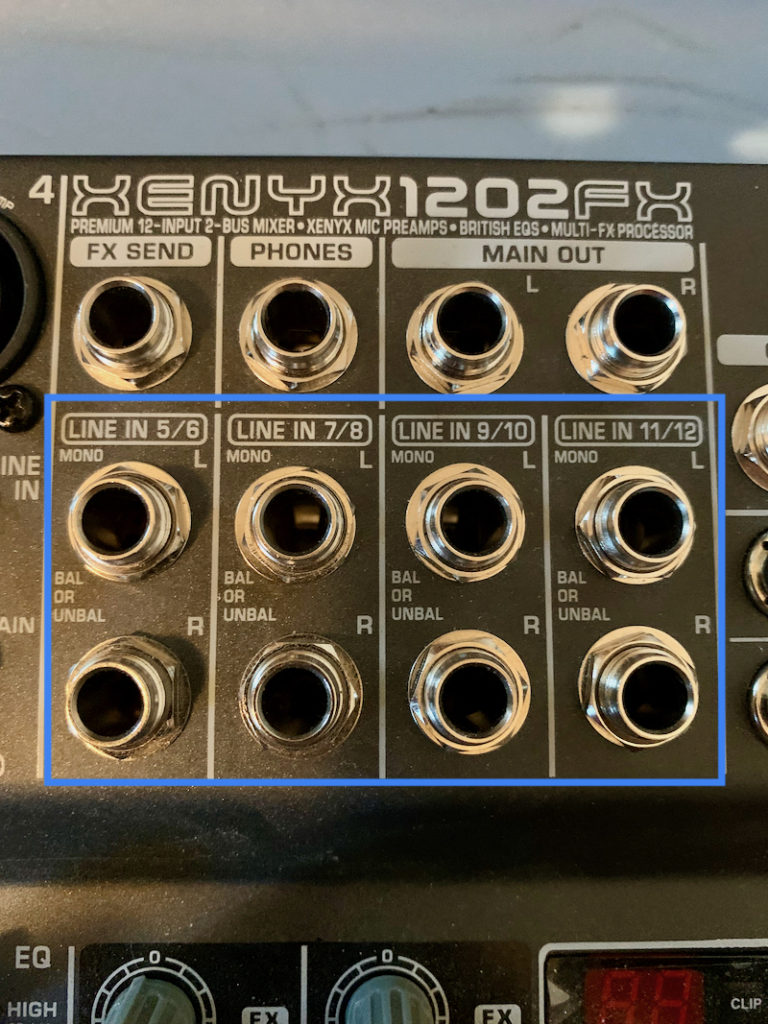
To connect this to your laptop, you’ll need a 3.5mm (1/8″) to 1/4″ Y splitter cable, such as the UGREEN 3.5mm to 1/4″ Y stereo cable.
The two 1/4″ plugs go to their respective inputs on the mixer (L and R). The other end, the 3.5mm (1/8″) then connects to the headphone jack on your laptop.
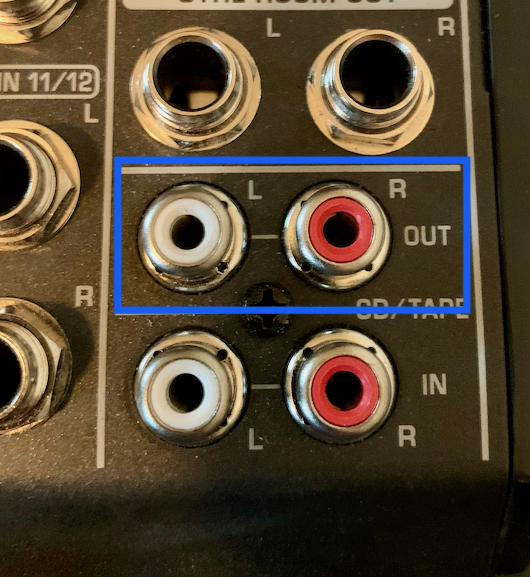
2) RCA inputs. Look for the small red and white circle inputs on your mixer. Those are RCA inputs. (There will also be two RCA outputs – you won’t use those in this case.
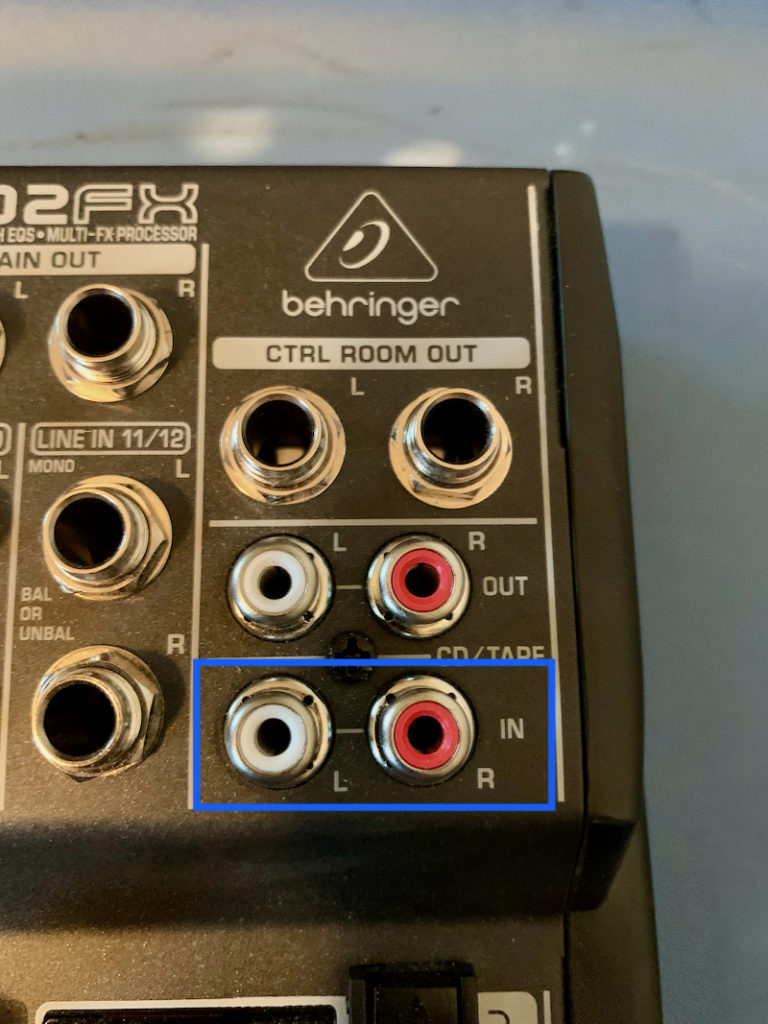
To connect this to your laptop, you’ll need something like a 2-Male RCA to 3.5mm (1/8″) cord. The two RCA inputs connect to your mixer (match the color on the cord to the RCA color on the mixer), and the other end (3.5mm) connects to your laptop headphone jack.
I use the RCA option. I don’t think one method is necessarily better than the other, but it’s what I was taught!
Note that I didn’t connect my laptop to channels 1-4 on the mixer, as those aren’t stereo channels – they’re mono channels. Thus, they won’t give you best audio quality for your music.
What If the Headphone Port Is Flimsy?
Sometimes the headphone jack on a laptop is flimsy and unreliable. The cord may wiggle or not feel super secure.
So that’s one of the reasons I put a soundcard/audio interface between the laptop and the mixer. In fact, most DJs I talked to do this too.
I use the Native Instruments Traktor Kontrol Z1. This connects to my laptop via USB port, which feels a lot more secure.
I then run RCA cords from the Traktor Kontrol Z1 to the RCA inputs on the mixer. The outputs on the Traktor Kontrol Z1 are both RCA, so I use a 2-Male to 2-Male RCA cord.
That Kontrol Z1 also has some mixing/EQ capabilities, plus there’s a headphone jack, so I can preview upcoming tracks without them playing through my sound system.
Some other audio interfaces DJs use include Presonus Studio 24c and Focusrite Scarlett and others.
Ready for the complete guide to becoming a wedding DJ? Here you go.

How to Connect a Microphone to a Mixer
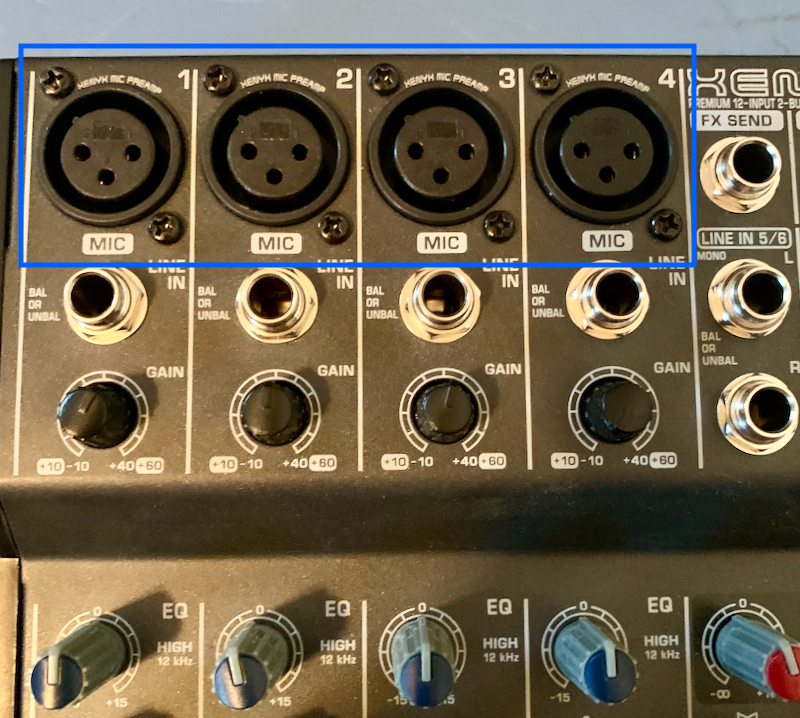
For a wired microphone, one end of the XLR cord (what’s called the female end) connects to the microphone. The other end, what’s called the male end, connects to the mixer.
These inputs are typically on the top of your mixing board (shown in the photo below).
For a wireless or lavalier microphone, you’ll need to connect the microphone receiver (that rectangular box thing that’s shaped like a thick pocket book) to the mixer. Typically, you’ll connect the female end of the XLR cord to the receiver and the male end to the mixer, just like what you do with the XLR cord for a wired microphone.
How to Connect an Instrument to a Mixer
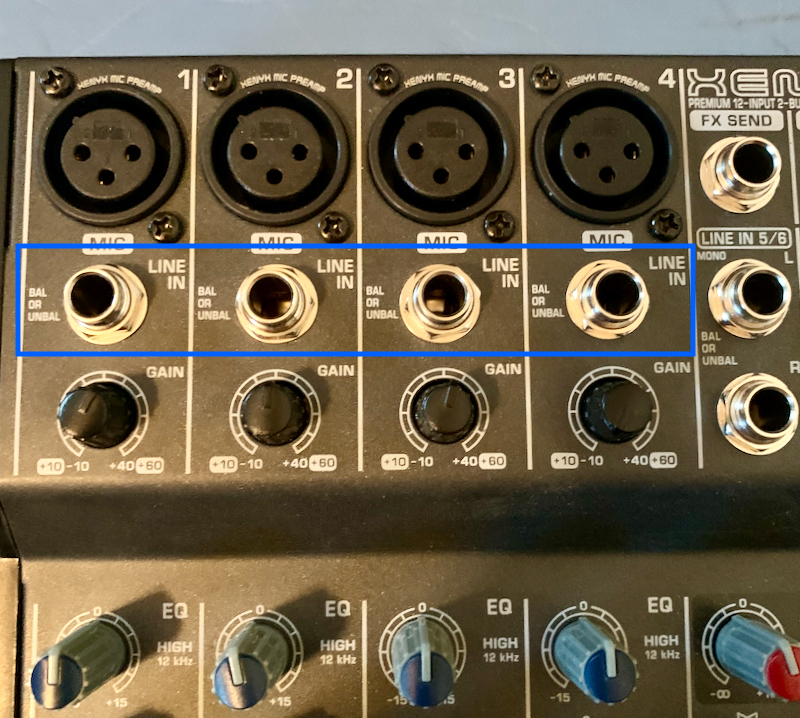
If you need to plug in an electric acoustic guitar or some other instrument with a cord, that’ll typically go to the 1/4″ input on a channel. (This is shown below, as a LINE IN input.)
Sometimes I need to plug my phone into the mixer to play a song from there that I didn’t have on my laptop. If so, I use a 1/8″ to 1/4″ cord. The 1/4″ side connects to the 1/4″ input on the mixer and the other end connects to the headphone jack on my phone.
When I upgraded to the iPhone XS, I was dismayed to see they eliminated the headphone jack! Luckily, all was not lost. I simply had to get the Apple Lightning to 3.5 mm Headphone Jack Adapter. I plug that into my phone, and then plug the 1/8″ side of the 1/8″ to 1/4″ cord into that.
It’s an example of sometimes you just have to get creative. Sometimes you need to use various adapter cords because of equipment quirks or special situations that arise. That’s why I have tons of different cords and adapters just in case.
Examples:
- 1/4″ to 1/8″ adapters
- 1/8″ to 1/4″ adapters
- 1/4″ to RCA cable
- XLR female to 1/4″ cable
- XLR male to 1/4″ cable
How to Connect Speakers to the Mixer
Near the top of your mixer, you should see two main outs. One will have an L (left) by it, and the other will have an R (right) by it.
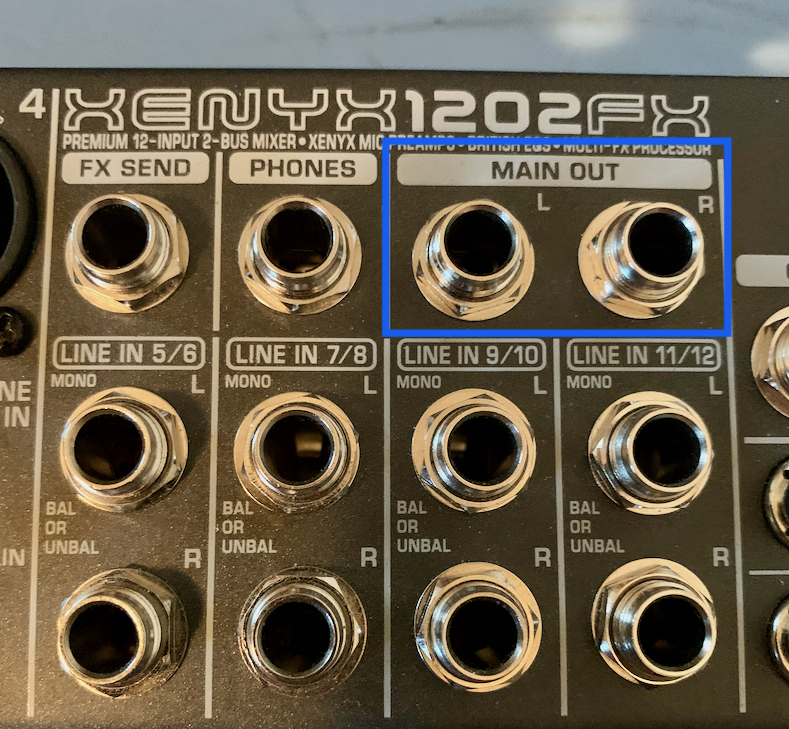
Connect a 1/4″ cord from there to the correct speaker: The L input should be used to connect a cord to the left speaker, etc.
Remember, the L speaker is what’s left for the dance floor, not you. So, in a typical DJ setup, where you have a speaker on each side of your DJ table, what’s on your left, will be the dance floor’s right, and so on.
How to Control the Sound of a Microphone or Instrument
You can then use the controls on each channel to get a good sound and volume for what’s plugged into it.
- Volume and gain will help you control the volume. If you’re getting feedback, turn down the gain, as that can often be the culprit. As equipment manufacturer Mackie says, “…the gain control is used to bring the input signal from the source up to a nominal level in the same way as any analog device. Specifically, the gain determines how much the analog audio signal is amplified by the preamp.”
- EQs help you further tweak the sound, the highs, the lows, and the mids. Mess with these until you get a sound you like. One tip: If you’re getting a lot of echo because of the room, turn the mids down. That’s helped me.
There are other buttons, but I typically don’t mess with those. I keep everything panned to the center. And I don’t turn on effects, but you could if that makes sense for what you need.
During speeches, stand right by the mixer. People talk on the microphones in all kinds of way. Some have loud voices, some have quiet. Some hold the microphone close to their mouth (correct!), while others hold it way far away (wrong!). So you’ll likely need to tweak the audio settings while they speak.
Where Can Videographers Plug Into Your Mixer?
Many videographers want to record audio of the ceremony, speeches, etc., and will want to plug into your system. Don’t balk – say sure!
They’ll need to connect from their portable recorder to your system. I’ve noticed many videographers use a Zoom portable recorder, such as the Zoom H1n.
The best spot is usually through the RCA outputs on your mixer. Typically this means using something like a 2-Male RCA to 3.5mm (1/8″) cord. The RCA side of the cord connects to your mixer, while the 3.5mm side connects to their portable recorder.
Hopefully, they have this cord, but if not, make their day and let them borrow one of yours. Again, it’s a good idea to have several additional cords and various adapters so you can be ready for any audio needs.
Fixing Issues
The following articles may help you with common sound problems. With any problem, I recommend changing one variable at a time (one cord, one input, etc.) until you can pinpoint where the problem is coming from.
- If after plugging everything in and turning it on, you hear noises coming from the speaker, it may be any number of things. It may be something that can be fixed on the mixer, or something in the cords or the speaker itself, or some other reason. Review the article Easy Fixes for Speaker Noise, Hum, and Buzzing Sounds for a bunch of things to try.
- If your wireless microphone is making noises, then review the article Easy Fix for Wireless Microphone Popping/Static Sound for help.
Have a Backup Mixer and Power Cord!
The mixer is such a crucial part of DJing weddings that if yours totally stops working, you could be in trouble.
That's why I recommend having a backup mixer. It can be the same as your main mixer or one that's simply good enough to get the job done. This can be the same mixer from your crucial second setup.
If the backup mixer is the same as your regular one, that'll also give you another power cord in case your main power cord breaks. If not, be sure to have a backup mixer power cord with your equipment.
Problems will happen. You don't want to be lost. Be prepared.
Conclusion
Sound mixers are an essential part of the wedding DJ setup. Luckily, they're fairly easy to use! Plug in everything right, get the volume and EQ sounding nice, and you'll make your audio sound great.
Related Articles:
- Complete Wedding DJ Equipment Guide
- 3 Microphones Wedding DJs Need
- Why Wedding DJs Must Have a Second Setup
- How to Set Up DJ Equipment for a Wedding Reception Like a Pro
- Easy Fixes for Speaker Noise, Hum, and Buzzing Sounds
- Easy Fix for Wireless Microphone Popping/Static Sound
- The Wedding DJ "Just in Case" Kit
- Wedding DJ Equipment Checklist: Everything You Need for a Wedding DJ Business
*If you click the product links and make a purchase, we earn a commission. This helps pay for this website and other expenses. This is at no additional cost to you.